Configuring the Index Generation Mode
You’ll find the Index Generation Mode under the Internal Link Juicer’s “Setting” section on the left-hand bar. Get there by following these instructions:
-
Open the “General” tab in the plugin settings
You’ll see three tabs under the “Settings” section: “General”, “Content” and “Links”. Click on “General” to get to the Index Generation Mode settings.
-
Look for the “Index Generation Mode” setting
Under these settings, you’ll see the “Index Generation Mode” text with a drop-down menu of three items. Here’s where you can choose between modes. Not sure which one is best for your site? Read about all three modes below!
-
Save your selection
After you select a mode in the drop-down, be sure to click “Save Changes” at the bottom of the tab. Without it, your changes won’t be kept.
Explaining the Index Generation Modes
There are two modes for building the index. The link index ensures that the customer-facing front end is always maximally performant. The configured mode influences how the index is constructed and what triggers the building.
Let’s go over the details for each one:
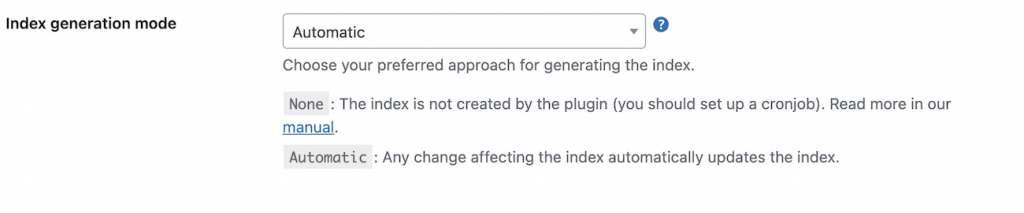
Automatically
The automatic index generation option is the default setting. As its name suggests, the Internal Link Juicer automatically updates the link index for you. For example, if you save a post or change a plugin setting, the index for these changes will get built automatically in the background.
None
Only use this mode if you know exactly what you are doing!
The second option is “None”, which means you disable index generation handled by the plugin. Instead, index generation can be handled by the wp-cli extension of the Internal Link Juicer. In this way, you can better customize index generation beyond just automated or manual updating.
If you’re interested in this option, you can build your own command line through the wp-cli extension. You must have the wp-cli installed on your server first. Just use the following command to rebuild the index:
$ wp ilj index buildSpecifically, you can set up customized server-side cron jobs. For example, if you want the index to be rebuilt by the console application every hour, you can use the following command:
0 * * * * cd [path to your wordpress installation] && wp ilj index build